Tuesday, July 24, 2012

Perfect Composition : FAKER!!!

Working with animals is pretty hard even if they are your pets! Its hard to get them to sit still and stay in one place while you focus and take those pictures (unless their cats)


Achieving a composition like this one would take an extremely LONG time to possition all the dogs or even be able to get the dogs to stand still while all in frame at once. Luckily there are cheats...


You'll need a Tripod for this one. And it simply involves waiting for the right moment and when each dog walks into the spot you want it, then snap the picture.. Edit it and cut out the doggies so they all appear to be in the frame at once. 

It isn't a very hard process, but some people forget this technique when trying to achieve that perfect composition. 

(those tiny dogs in the corner just would not sit still, so I left the camera on video mode and placed those dogs there myself) 


This photo is done the same way as the one above
the patterns in the couch make is easier to do a sloppy job! yay

If you're having trouble composing a perfect shot with moving subjects and you happen to have a 
tripod or a table to set your camera on, just remember this technique. 

Cause like 70% of the things on the internet are doctored anyways right? 

Tuesday, July 3, 2012

ANIME EXPO 2012


Anime expo 2012 was a blast!

ummm But you could go to any site to read about the events and stuff... I'll cut straight to the pics... At the end I'll go over some of the editing and nerdy technical aspects...


Click to enlarge any of these pics....
I AM MAD SCIENTIST!!! It's so cool!!!

"Please shut it off" - Rocco 

if you don't remember this, think of an old arcade game where you dig


EVANGELION SECTION: 


okay back to the rest:


spent all his money on the costume?


Okay so here's how I edited a lot of my images:

Duplicate the layers, then invert and convert the top layer to black&white


Change the top layers blending mode to Overlay


Change the opacity (of the top layer) to well whatever looks good to you, and also
do a Gaussian blur to the top layer, whatever looks good to you - experiment lameo!


Merge the two layers and do an Unsharp mask to touch it up.

so here's a compassion:
Overlay - Gausian blur - Unsharp Mask 


See the difference? 

And finally, this is optional cause sometimes its looks good.

The top image is before and the bottom image is after I bumped up the contrast... 
judge for yourself.


Monday, June 25, 2012

Food Photography


well I gave it a shot (get it)... but I'm no pro

YEAH IT ALWAYS LOOK BETTER IN PICTURES THAN IN REAL LIFE...


here's my before

I removed the bun crack, brightened the colors and added a Gluttony in the background for comedic effect.


Without a Reflector:
you can see how moody this burger looks when you do the same editing to it as above... ewww so sad... 


so I didn't have a second reflector... Whatever... I used something! (its my mothers shopping bag! okay?!)

My main source of light was the window...


and if you're wonfering what this tasty hamburger looks like from behind check out this video ;)


Friday, June 22, 2012

Using Reflectors : Cat Images


Cat pictures! :3 

using a reflector...


The reflector is more useful than I first though... Back in high school they had a 
Film broadcast and everytime they interviewed people
you could totaly see the bright glare from them using a reflector...
he's not too interested in reflectors... little does he know the curtain also doubles as a reflector!


so for a while I was against it.. This is my first time using a Neewer reflector
I got of amazon for $8 

use the reflector whenn you can!! XD 

it makes a huge difference!!

Get as close to the subject as you possibly can without getting the reflector in the shot... 

or unless you want to use the reflector as a white background! ;) 

well this would be more educational if I added a with and without picture... hold up I'll go do it now.. 
but its late so I don't have any Natural Light to work with... and my cat's sleeping in a dark spot of the house... ugh.. okay hold on... 


okay so here's without the reflector. The photo is more contrasy and if you want a dark, lonely mood
then using no reflector is good :P  
it also looks crappy out of context so maybe moody isn't good... 
This is with the reflector. 
no settings on the camera were changed and both images were processed the same. (curves and sharpness)

but this one has a happier, more colorful mood. Also the Mega64 artwork gets some light shed on it... 

(perhaps I'll use a tripod one day... cause I did NOT move the cat.. blame it on the light...) 


Sunday, May 20, 2012

5/20/12 Southern California Partial Eclipse


Sunday, May 20th, 6PM, Southern California - Orange County, everyone in my neighborhood is gathered to watch the eclipse, either through my Camera's LCD or through our neighbors welding mask.


okay soo I admit there is some photo manipulation on the detail of the moon. But you know what> Perhaps the final product is more important than the "wow factor" of "That was actually there when you took the picture!?!?!?" 


anyways I"ll throw in some technical info: 
Canon T3i 
Canon USM 70-300mm
CineStyle
1/4000
1.2  ND Filter
f/32 
yeah.... 

some photoshop work and color curves... :P  


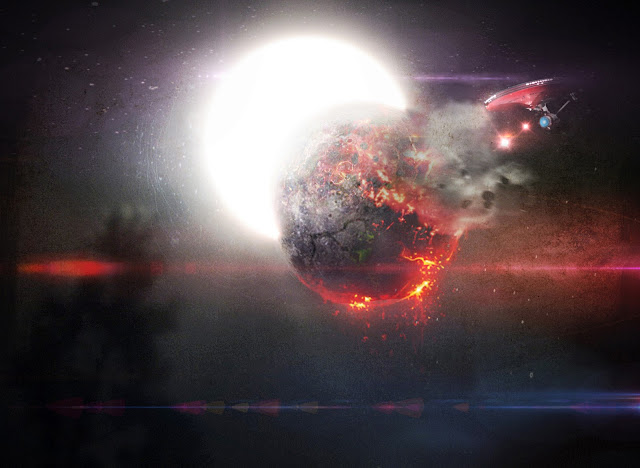
watched star trek and Titan A.E. today... got bored afterwards and played around in photoshop... haha

Monday, April 23, 2012

From Flat to Finished


Any photographer who calls themselves a "pro" understands that the image the camera takes when you press the shutter button, is NOTHING like the final image.


Its called shooting flat or raw. The initial image is really dull, grey and the colors just don't shine at all. What does this accomplish besides a crappy looking image? 

Take this for example:
This is my original photo on this weird looking flower thingy? As you can see very dull and lifeless.. 
But what this accomplishes is something every photographer desires - Preservation of detail.  

  ...the same applies for video. 


Shooting in a "Flat " Picture style will guarantee amazing details and that "professional" look at the cost of 
spending some "professional" time in front of photoshop or whatever you use...  


And now we see a bright, vivid, detailed photo. (mostly using curves, brightness and contrast, levels and HSL)


Taking a closer look some of the details in the grass blades and petals really shine in the edited version. And I was able to successfully bring all the colors back to the image. 


You can download Picture Styles to install to yoru camera, the most popular: 
CineStyle - meant for Cinematographers to get the most out of their DSLR. 
or you can just use your Camera's built in Neutral Setting, just turn down the Saturation and Contrast and you'll be good.

Now for those who already know about this, here's some advice, use Cinestyle indoors and in controlled lighting conditions... but I prefer to use Neutral when it comes to Harsher lighting conditions like bright overhead sunlight. I find that neutral tends to perform better in harsh lighting than Cinestyle because of Neutrals lesser Dynamic Range let you expose properly :P 

now I don't have any photos to prove it at the moment... 

CineStyle I keep my sharpness at 2

Other Images before and After: 


Just some facts to justify my statement (because some people are skeptical) 
* What would be shadows and complete darkness on normal picture style would now be visible and lit on a Flat picture Style = Increased Dynamic Range
* The grayness is a sort of bypass to prevent the camera from processing the color data too much destroying what valuable details might have been there
* yeah it creates more work later on... :P 
* you take the risks though, be a "pro" and be wiling to spend long hours editing photos or just shoot for fun and don't worry about all the little details... Literally...