Sunday, May 20, 2012

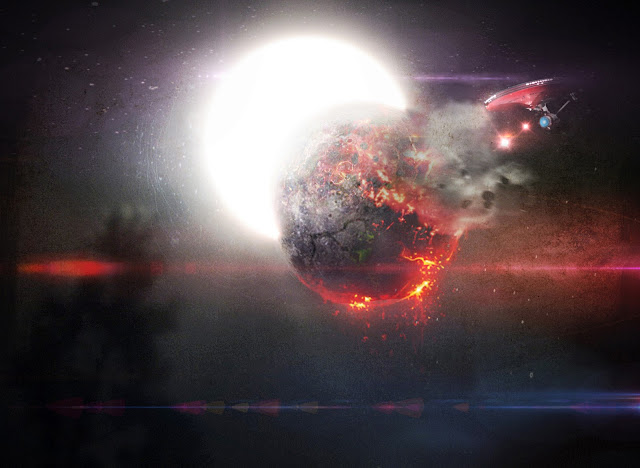
5/20/12 Southern California Partial Eclipse


Sunday, May 20th, 6PM, Southern California - Orange County, everyone in my neighborhood is gathered to watch the eclipse, either through my Camera's LCD or through our neighbors welding mask.


okay soo I admit there is some photo manipulation on the detail of the moon. But you know what> Perhaps the final product is more important than the "wow factor" of "That was actually there when you took the picture!?!?!?" 


anyways I"ll throw in some technical info: 
Canon T3i 
Canon USM 70-300mm
CineStyle
1/4000
1.2  ND Filter
f/32 
yeah.... 

some photoshop work and color curves... :P  


watched star trek and Titan A.E. today... got bored afterwards and played around in photoshop... haha

Monday, April 23, 2012

From Flat to Finished


Any photographer who calls themselves a "pro" understands that the image the camera takes when you press the shutter button, is NOTHING like the final image.


Its called shooting flat or raw. The initial image is really dull, grey and the colors just don't shine at all. What does this accomplish besides a crappy looking image? 

Take this for example:
This is my original photo on this weird looking flower thingy? As you can see very dull and lifeless.. 
But what this accomplishes is something every photographer desires - Preservation of detail.  

  ...the same applies for video. 


Shooting in a "Flat " Picture style will guarantee amazing details and that "professional" look at the cost of 
spending some "professional" time in front of photoshop or whatever you use...  


And now we see a bright, vivid, detailed photo. (mostly using curves, brightness and contrast, levels and HSL)


Taking a closer look some of the details in the grass blades and petals really shine in the edited version. And I was able to successfully bring all the colors back to the image. 


You can download Picture Styles to install to yoru camera, the most popular: 
CineStyle - meant for Cinematographers to get the most out of their DSLR. 
or you can just use your Camera's built in Neutral Setting, just turn down the Saturation and Contrast and you'll be good.

Now for those who already know about this, here's some advice, use Cinestyle indoors and in controlled lighting conditions... but I prefer to use Neutral when it comes to Harsher lighting conditions like bright overhead sunlight. I find that neutral tends to perform better in harsh lighting than Cinestyle because of Neutrals lesser Dynamic Range let you expose properly :P 

now I don't have any photos to prove it at the moment... 

CineStyle I keep my sharpness at 2

Other Images before and After: 


Just some facts to justify my statement (because some people are skeptical) 
* What would be shadows and complete darkness on normal picture style would now be visible and lit on a Flat picture Style = Increased Dynamic Range
* The grayness is a sort of bypass to prevent the camera from processing the color data too much destroying what valuable details might have been there
* yeah it creates more work later on... :P 
* you take the risks though, be a "pro" and be wiling to spend long hours editing photos or just shoot for fun and don't worry about all the little details... Literally... 


Wednesday, April 11, 2012

Seeing Stuff in the Clouds


so either you'll think this post is REALLY COOL 
or
you'll think its pretty stupid and a waste of time...

BEFORE YOU SCROLL DOWN!!!
Take a good look at the picture below... 
What do you see? O .o 
(click to enlarge) 

This is what I saw... 

|
|
|
|
|
|
|
|
|
|
|
|
|
|
|
V


(yeah I was bored today) 

The cat was done by my older brother... i have no clue how he got a cat out of that though... 
-____- 


Here's another one: 

Don't wanna let my outlines spoil it for you, I want you to be able to see 
something different from me so you can 
download the image, outline it and 
post a link for all to see! ;) 
|
|
|
|
|
|
|
|
|
|
|
|
|
|
|
|
|
|
|
|
|
V

its actually quite fun... Unfortunately I didn't take much pictures... so I guess I'll update this more if its interesting?


Thursday, February 23, 2012

Lazy Linus

 Perhaps the coolest cat I've ever owned, now I'm not going to try to turn this into a photography lesson or anything, because sometimes its not about using special techniques and rule of thirds...

 Sometimes the only thing that matters is whats in front of the camera... no matter how awesome your angle is, how fast your shutter speed it or how much DOF you have in the shot... none of that matters if your subject is boring ;)
Blending in is the only way I can survive...

oh yeah... 

Zzzzzzzzzzzz


if you really want something out of this post it would be this:

Don't waste too much time learning techniques and stuff, sure its important, but a lot of your time should also be spent with the side that "normal people" actually care about - subjects...

Tuesday, February 7, 2012

HDR Tutorial ( Photomatix )

So you've taken your 3 Bracketed photos but don't know exactly how to EDIT them to make that amazing HDR look.. no fear! This tutorial is SUPER DUPER CRAZY EASY!!! (if you're a noob and don't know what HDR is or how to take HDR photos, look at THIS POST first) 


Photomatix is a $100 program that takes your 3 images and combines them into one BEAUTIFUL HDR image and although this can easily be done in Photoshop or other FREE HDR programs, for the sake of this tutorial I will use Photomatix! 


STEP 1: select


Chose "Load bracketed photos" and pick your 3 pictures you want to use. (easy... TOO EASY!!!) ....


 it will give you some options such as noise removal and what not, feel free to pick what you want... figure out what it does on your own... 


Press ok and let it do its thing... it will take some time depending on your picture size and what not


STEP 2: edit


now you have this awesome screen which has a low quality preview of your final image... 


at the bottom are different presets for different looks, "enhancer - Grunge" is the one I have selected in the image above... 


Play with the settings and style so you can get something that fits what you're looking for. 


when you're happy press the big "PROCESS" button at the bottom... 


STEP 3: save


Now it seems like you're done but don't exit yet! 


click "SAVE AS" and chose whatever, I usually do JPEG for convenience. 


If you exit before you save as, you might lose your incredible 2 steps of hard work!!! 


(and did I mention Photomatic saves your adjustments from previously on to any future projects, so even if you did screw up, all your adjustments would STILL be there anyways... AMAZING!!!!) 


THE FINISHED PRODUCTS: 


I edited this one a little more with curves, brightness and contrast and sharpening effects... click to enlarge


hope you enjoyed this super simple tutorial, the free HDR programs all have a similar work flow, just some of them don't have as nice presets... 


the HDR tool that comes with Photoshop doesn't even have presets, and trust me, doing it manually... good luck! :P all it does is combine your 3 images, but no special looks... 

HDR (A Quick How to Lesson)

HDR (high Dynamic Range) is a technique in photography where 3 (or more) pictures are taken of the same subject with DIFFERENT Exposure values.


 [There are ways to pull off this look with only ONE image taken, known as FAKE HDR, which can still look nice when done to the right image, but the REAL HDR will undoubtedly ALWAYS look better!] (simply because the details being emphasized are actually there in REAL HDR, where as in FAKE HDR its more of tricking the viewers to think the details were actually there....)


After editing the 3 pictures down into one, you end up with an image that most accurately represents how the human eye would see the world, OR, the effects can be exaggerated to bring out the details even MORE and create a surreal effect... 


If you don't know how to set your camera to shoot 3 pictures with different exposures, here's a quick lesson on it (Canon users - Nikon Losers ... no jk it should be pretty much the same on both DSLRs) 


Set the camera to "M" and set your picture, adjust your setting and all that stuff you would normally do for a normal picture, once you get an average set up, press the "Q" button and navigate to the Exposure Settings and click "set"

The thingy circled in green is the exposure menue, select it and roll the dial on the top of you camera to set the bracketing... the more the bracketing the more dramatic the difference will be between your shots...


for Magic Lantern users, simply turn HDR bracketing "ON" and that's all you'll have to worry about! >:P 


Now your camera is ready to shoot 3 pictures at 3 different exposures! You might want to add a delay/timer so when you press the button it takes a while before the camera actually takes the pictures 


(to prevent shake in the photo from when you press the camera - and also cause the 3 different pictures have to be EXACTLY the same in terms of composition) 

anyways BLAH BLAH BLAH! in the next post it'll be time to learn how to go from the 3 pictures above to this: 


This is a more exaggerated look, the details seem to POP in a surreal look, there are tons of different effects you can go for, so don't feel like all HDR images will look like paintings... 


Thursday, December 15, 2011

Dynamic Lighting - Moody Flowers

Short - Sweet - To the Point! :)

Dynamic Lighting is lighting where there is ONE definitive, bold, light source that creates an uneven lighting contrast of bright brights and dark shadows...
this isn't the harshest of lighting conditions, but it still emphasizes detail in the flower as well as in the cloth

a little harsher?

window as dynamic light source
 the main light source for the first picture was the window, the rest of the room was dark for the most part even though there were other light sources (windows). The flower is a little lower than the window. (light source)

The light source for the second picture was the same window, though the position was much farther away from the window. The flower is level with the window...

of course the lighting doesn't always have to be 90 degree angles... The light source (sun) is almost directly facing the camera, revealing detail on the window and wood, that would not otherwise be visible had there been other light sources present (say on the other side of the window...) ...or had there been a bottle of windex nearby... 

Below is a great tutorial on how to do FAKE Dynamic lighting with some editing...

http://psd.tutsplus.com/tutorials/photo-effects-tutorials/add-dynamic-lighting-to-a-flat-photograph/