Thursday, February 23, 2012

Lazy Linus

 Perhaps the coolest cat I've ever owned, now I'm not going to try to turn this into a photography lesson or anything, because sometimes its not about using special techniques and rule of thirds...

 Sometimes the only thing that matters is whats in front of the camera... no matter how awesome your angle is, how fast your shutter speed it or how much DOF you have in the shot... none of that matters if your subject is boring ;)
Blending in is the only way I can survive...

oh yeah... 

Zzzzzzzzzzzz


if you really want something out of this post it would be this:

Don't waste too much time learning techniques and stuff, sure its important, but a lot of your time should also be spent with the side that "normal people" actually care about - subjects...

Tuesday, February 7, 2012

HDR Tutorial ( Photomatix )

So you've taken your 3 Bracketed photos but don't know exactly how to EDIT them to make that amazing HDR look.. no fear! This tutorial is SUPER DUPER CRAZY EASY!!! (if you're a noob and don't know what HDR is or how to take HDR photos, look at THIS POST first) 


Photomatix is a $100 program that takes your 3 images and combines them into one BEAUTIFUL HDR image and although this can easily be done in Photoshop or other FREE HDR programs, for the sake of this tutorial I will use Photomatix! 


STEP 1: select


Chose "Load bracketed photos" and pick your 3 pictures you want to use. (easy... TOO EASY!!!) ....


 it will give you some options such as noise removal and what not, feel free to pick what you want... figure out what it does on your own... 


Press ok and let it do its thing... it will take some time depending on your picture size and what not


STEP 2: edit


now you have this awesome screen which has a low quality preview of your final image... 


at the bottom are different presets for different looks, "enhancer - Grunge" is the one I have selected in the image above... 


Play with the settings and style so you can get something that fits what you're looking for. 


when you're happy press the big "PROCESS" button at the bottom... 


STEP 3: save


Now it seems like you're done but don't exit yet! 


click "SAVE AS" and chose whatever, I usually do JPEG for convenience. 


If you exit before you save as, you might lose your incredible 2 steps of hard work!!! 


(and did I mention Photomatic saves your adjustments from previously on to any future projects, so even if you did screw up, all your adjustments would STILL be there anyways... AMAZING!!!!) 


THE FINISHED PRODUCTS: 


I edited this one a little more with curves, brightness and contrast and sharpening effects... click to enlarge


hope you enjoyed this super simple tutorial, the free HDR programs all have a similar work flow, just some of them don't have as nice presets... 


the HDR tool that comes with Photoshop doesn't even have presets, and trust me, doing it manually... good luck! :P all it does is combine your 3 images, but no special looks... 

HDR (A Quick How to Lesson)

HDR (high Dynamic Range) is a technique in photography where 3 (or more) pictures are taken of the same subject with DIFFERENT Exposure values.


 [There are ways to pull off this look with only ONE image taken, known as FAKE HDR, which can still look nice when done to the right image, but the REAL HDR will undoubtedly ALWAYS look better!] (simply because the details being emphasized are actually there in REAL HDR, where as in FAKE HDR its more of tricking the viewers to think the details were actually there....)


After editing the 3 pictures down into one, you end up with an image that most accurately represents how the human eye would see the world, OR, the effects can be exaggerated to bring out the details even MORE and create a surreal effect... 


If you don't know how to set your camera to shoot 3 pictures with different exposures, here's a quick lesson on it (Canon users - Nikon Losers ... no jk it should be pretty much the same on both DSLRs) 


Set the camera to "M" and set your picture, adjust your setting and all that stuff you would normally do for a normal picture, once you get an average set up, press the "Q" button and navigate to the Exposure Settings and click "set"

The thingy circled in green is the exposure menue, select it and roll the dial on the top of you camera to set the bracketing... the more the bracketing the more dramatic the difference will be between your shots...


for Magic Lantern users, simply turn HDR bracketing "ON" and that's all you'll have to worry about! >:P 


Now your camera is ready to shoot 3 pictures at 3 different exposures! You might want to add a delay/timer so when you press the button it takes a while before the camera actually takes the pictures 


(to prevent shake in the photo from when you press the camera - and also cause the 3 different pictures have to be EXACTLY the same in terms of composition) 

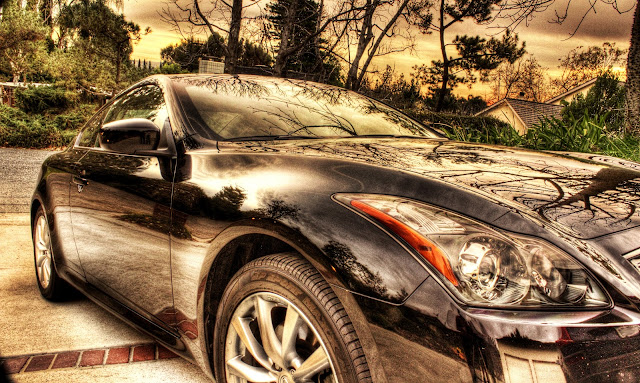
anyways BLAH BLAH BLAH! in the next post it'll be time to learn how to go from the 3 pictures above to this: 


This is a more exaggerated look, the details seem to POP in a surreal look, there are tons of different effects you can go for, so don't feel like all HDR images will look like paintings...